


Escolhendo o Canvas e Materiais Certos
Conseguir a tela certa e os materiais adequados faz muita diferença ao aprender a pintar por números. Uma tela de boa qualidade realmente muda toda a experiência. Telas pré-esticadas ou pranchas são as melhores opções, pois não deformam com tanta facilidade ao longo do tempo. Elas oferecem aos pintores uma superfície sólida para trabalhar, que resiste a várias camadas de tinta sem entortar, mantendo as cores vivas por anos. Investir em materiais de qualidade compensa no final. Suprimentos melhores não apenas deixam a obra final com uma aparência mais bonita, mas também proporcionam uma sensação mais agradável durante o processo de pintura.
Conseguir os materiais certos faz toda a diferença ao começar. Para mais detalhes, opte por pincéis com cerdas finas, pois eles realmente alcançam áreas pequenas. Pincéis mais largos funcionam muito melhor em superfícies maiores, onde a cobertura é mais importante. A maioria dos kits de pintura por números vem com tintas acrílicas, pois secam rapidamente e não borram com facilidade, o que evita problemas mais tarde. Se alguém deseja resultados realmente bons, não fique apenas com o que está incluído em kits inicias baratos. Invista em tintas de melhor qualidade e vá acumulando pincéis de diferentes tamanhos ao longo do tempo. O custo adicional compensa ao trabalhar em partes complexas das pinturas que exigem atenção cuidadosa.
Materiais para diamond painting e conjuntos com telas numeradas estão disponíveis praticamente em toda parte nos dias de hoje. Lojas online dedicadas a artigos de artesanato oferecem uma infinidade de opções diferentes, geralmente com preços competitivos o suficiente tanto para iniciantes quanto para profissionais que buscam itens especiais. Mesmo assim, muitos entusiastas ainda preferem visitar lojas físicas. Há algo na experiência de manipular fisicamente os materiais antes da compra que faz toda a diferença ao escolher suprimentos para um projeto específico. A textura se sente mais adequada ao toque, as cores parecem mais verdadeiras sob a iluminação da loja e, às vezes, você encontra verdadeiras joias escondidas enquanto percorre os corredores.
Organizando Tintas e Pincéis de Forma Eficaz
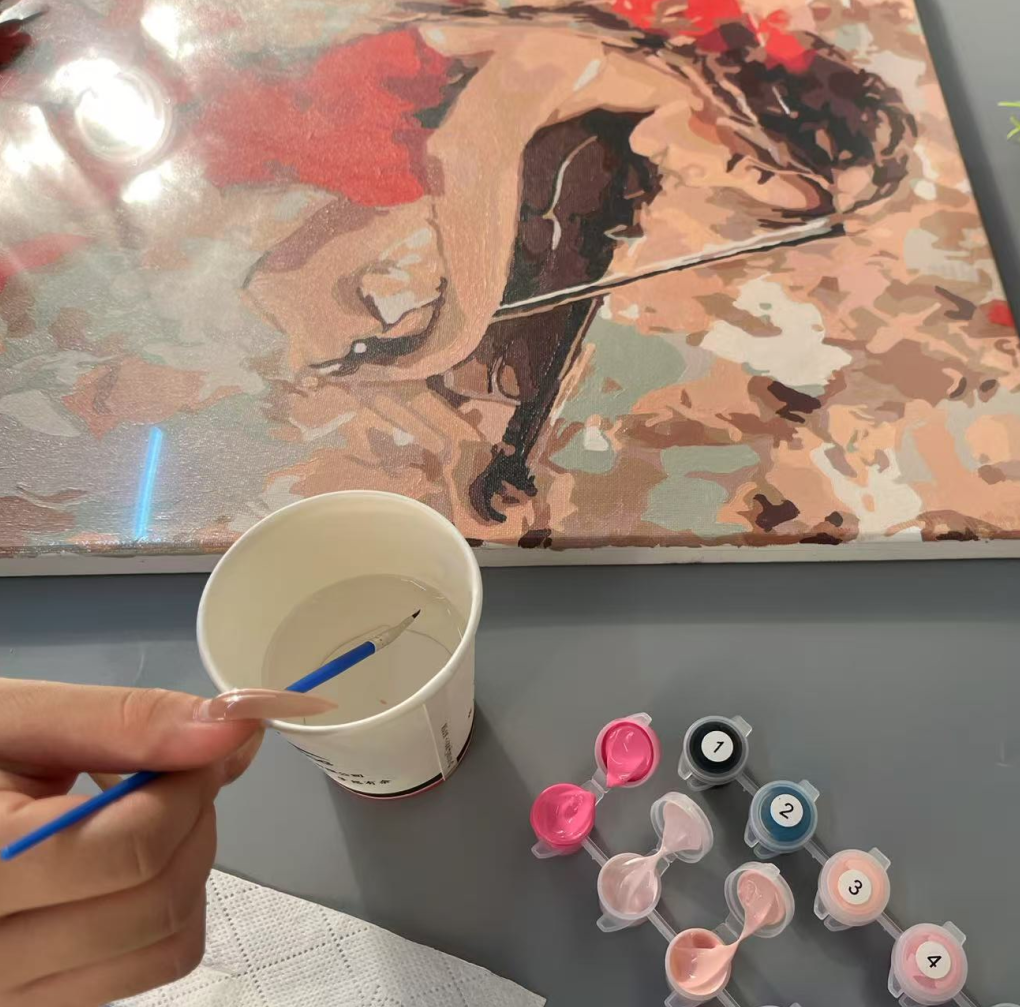
Manter as tintas e pincéis organizados faz realmente diferença ao trabalhar em projetos artísticos. Um sistema simples de codificação por cores funciona maravilhas para a gestão das tintas. Basta organizar as cores na paleta de acordo com seus tons ou matizes, para que sejam mais fáceis de identificar quando necessárias. Isso economiza tempo procurando durante as sessões de pintura e ajuda a manter transições suaves de cor entre diferentes seções da obra. Pais que fazem pintura de diamante com crianças também encontrarão a organização especialmente útil. Gerenciar todas aquelas peças pequenas torna-se muito menos frustrante quando tudo tem seu lugar, reduzindo erros e evitando dores de cabeça mais tarde.
Manter as escovas bem cuidadas faz toda a diferença quando se trata de preservar a sua qualidade e usá-las por anos. Após terminar uma sessão de pintura, os pintores precisam limpar bem as escovas com água morna misturada com sabão suave, seguido de uma secagem cuidadosa para evitar danificar aquelas cerdas preciosas. Ao armazenar as escovas, mantê-las em posição vertical funciona maravilhas para impedir que as cerdas fiquem achatadas, ao mesmo tempo que permite a circulação de ar em torno do cabo. Este passo simples ajuda a prevenir o crescimento de mofo e a deterioração da madeira, que podem estragar até cabos de escovas caras ao longo do tempo. Alguns minutos gastos com os cuidados adequados após cada uso compensam muito no longo prazo.
Preparar uma área adequada para pintura realmente ajuda os artistas, pois tudo de que precisam fica ao alcance e guardado de forma organizada. O espaço precisa ter boas soluções de armazenamento para todas aquelas tintas, diferentes tipos de pincéis, paletas e qualquer outra coisa usada com frequência. Nada mais de procurar pelas coisas ou lidar com ambientes desorganizados. Quando tudo está em ordem, os artistas acabam economizando tempo valioso de prática. Além disso, trabalhar em um ambiente limpo e acolhedor facilita entrar novamente no estado criativo, repetidamente. A maioria dos pintores perceberá uma melhoria em suas habilidades ao passar mais tempo consistente diante do cavalete, sem se frustrar com a desorganização.
Otimizando a Iluminação para Precisão
Uma boa iluminação faz toda a diferença ao tentar pintar com precisão. A maioria dos artistas prefere a luz natural do dia, já que ela mostra as cores exatamente como são, sem distorção. Mas o que acontece quando alguém precisa trabalhar até tarde da noite ou em um estúdio que não recebe muita luz solar? A iluminação artificial também funciona razoavelmente bem nos dias de hoje, especialmente as luzes LED, que permitem aos pintores ajustar a temperatura da luz sob a qual estão trabalhando. Optar por lâmpadas com alta classificação na escala de Índice de Reprodução de Cor (CRI) ajuda a criar condições mais próximas das reais de luz do dia, garantindo que o que aparece na tela corresponda à realidade. Muitos profissionais juram por essa abordagem depois de ver como as pinturas ficam diferentes sob configurações de iluminação variadas.
Conseguir uma boa iluminação no estúdio é muito importante, pois ninguém quer reflexos irritantes ou áreas escuras atrapalhando o espaço de trabalho. A maioria dos artistas descobre que combinar luzes do teto com uma boa luminária de mesa costuma ser a melhor solução para manter tudo uniformemente iluminado enquanto pintam. Isso ajuda a enxergar bem o que estão fazendo, sem forçar os olhos após horas diante do cavalete. Opções de iluminação ajustáveis também são muito úteis, pois permitem direcionar a luz exatamente para onde é necessária em diferentes etapas do processo. Algumas pessoas preferem uma luz mais forte ao aplicar grandes blocos de cor e depois mudam para uma iluminação mais suave nas partes mais detalhadas e delicadas.
A iluminação ajustável, como aquelas luminárias de mesa que artistas frequentemente utilizam, faz toda a diferença ao se preparar para diferentes fases da pintura. A possibilidade de ajustar os níveis de brilho e direcionar a luz para onde é necessária permite que os pintores lidem com tudo, desde detalhes intricados até áreas maiores, sem dificuldades. Acertar na iluminação ajuda realmente a manter um melhor controle dos movimentos do pincel e a alcançar detalhes mais refinados, o que afeta diretamente a qualidade final do trabalho.
Técnicas Principais de Pintura para o Sucesso
Começando com Cores Escuras Primeiro
Muitos artistas descobrem que começar com cores escuras funciona muito bem ao trabalhar com aqueles kits de pintura numerados. Os tons escuros criam uma base sólida que faz com que todos os outros elementos se destaquem melhor mais tarde. A maioria dos pintores experientes sugere começar com cores escuras porque isso ajuda a definir toda a cena logo no início. Ao aplicar esse método, escolha algumas cores profundas e intensas. Não tenha medo de misturar diferentes cores para obter efeitos mais ricos nas camadas de fundo. Quando essas bases são bem estabelecidas, o planejamento do próximo passo torna-se muito mais fácil. Pense nisso como construir uma casa: acerte a fundação e tudo o mais se encaixa naturalmente no lugar certo.
Dominando o Fluxo de Pintura de Cima para Baixo
Uma abordagem de pintura de cima para baixo destaca-se como uma das técnicas que os artistas consideram realmente úteis para agilizar seu fluxo de trabalho. Quando os pintores seguem esta ordem, eles tendem a evitar aquelas frustrações causadas por manchas de tinta e geralmente têm melhor controle sobre o desenvolvimento de sua obra. O processo começa no ponto mais alto da tela e avança para baixo, o que ajuda a manter o aspecto organizado. Trabalhar camada por camada facilita bastante a manipulação da tinta úmida, já que as partes concluídas têm tempo para secar enquanto outras áreas estão sendo trabalhadas. A maioria dos pintores experientes dirá a qualquer interessado que seguir métodos sistemáticos como esses mantém o estúdio limpo e, na verdade, economiza tempo a longo prazo, pois reduz erros e interrupções ao longo do processo.
Estratégias de Mistura para Transições Suaves
Dominar a técnica de mistura faz toda a diferença ao criar transições suaves em projetos de pintura por números, resultando em uma aparência coesa, ao invés de manchada. Existem vários métodos utilizados por artistas, incluindo técnicas de escova seca, abordagens de mistura úmida e efeitos de vidrado, que ajudam as cores a se fundirem naturalmente. A maioria dos pintores experientes sugere começar com projetos menores antes de enfrentar telas maiores, para que possam se familiarizar com o modo como diferentes materiais trabalham em conjunto. Às vezes, surgem problemas durante as sessões de mistura – cores acidentalmente misturadas ou listras irritantes que aparecem de forma inesperada. Geralmente, esses problemas desaparecem se a pessoa for paciente e investir em pincéis de qualidade. Uma boa mistura faz mais do que corrigir áreas de transição entre seções; ela realmente realça a aparência geral da obra de arte, conferindo-lhe mais dimensão e complexidade, o que destaca verdadeiramente o resultado final após a conclusão.
Abordagens Amigáveis para Crianças na Pintura
Selecionando Kits Apropriados para a Idade
Introduzir as crianças à pintura pode ser um desafio, por isso escolher o kit certo é muito importante tanto para a segurança quanto para a diversão. Os kits de arte para crianças costumam vir com materiais de fácil manuseio e atendem aos padrões de segurança que os pais procuram. Melissa & Doug, por exemplo, cria diferentes kits adaptados às várias faixas etárias, para que as crianças menores não se sintam frustradas com coisas muito complicadas. O que torna esses kits especiais é a forma como combinam pintura com outras atividades — às vezes há quebra-cabeças ou peças de montagem que complementam a obra de arte. Esse tipo de combinação ajuda as crianças a aprenderem enquanto brincam com cores. Quando os pais escolhem kits com várias funções, as crianças têm a chance de se expressar criativamente e, ao mesmo tempo, desenvolver habilidades de pensamento de forma natural, por meio da brincadeira.
Envolvendo Bebês com Design Simples
Para manter as crianças interessadas, precisamos de designs que combinem simplicidade com cores vivas. Quando se trata de pintura para crianças pequenas, optar por formas básicas e cores fortes faz toda a diferença, já que as mãos pequenas encontram esses elementos muito mais fáceis de manipular. Combinar sessões de pintura com histórias ou músicas abre novas possibilidades para a criatividade, ao mesmo tempo que trabalha de forma sutil os importantes movimentos dos pequenos músculos. A maioria dos pais dirá a qualquer um que pergunte como essas sessões de pintura parecem estimular a imaginação e melhorar a coordenação ao longo do tempo. Quebra-cabeças de madeira projetados para crianças pequenas podem funcionar muito bem em conjunto com atividades de pintura, oferecendo outra forma de as crianças explorarem texturas e padrões de maneira prática e satisfatória, mantendo-as envolvidas por mais tempo.
Dicas de Segurança para Jovens Artistas
Quando as crianças começam a se envolver com arte, a segurança deve estar no topo da lista de todos. Os pais precisam garantir que todos os materiais sejam não tóxicos, para que as crianças não entrem em contato com substâncias nocivas. A supervisão durante o momento de pintura não serve apenas para manter as crianças seguras, mas também permite aos adultos identificar quaisquer erros antes que se tornem problemas. Ensinar as crianças a usar aventais ou capas ajuda a manter as roupas delas bonitas e também as ensina a cuidar de seus pertences. E não se esqueça de limpar após os projetos artísticos. Criar o hábito de limpar as mesas e guardar corretamente os materiais mostra às crianças que a bagunça importa, e essas pequenas lições permanecem com elas muito depois da tinta secar.
Aperfeiçoando e Mostrando Sua Arte

Selando a Tinta para Longevidade
Se você deseja que suas pinturas finalizadas durem mais do que alguns anos, selá-las adequadamente faz toda a diferença. Hoje em dia, existem várias opções de selantes disponíveis. Vernizes em spray funcionam muito bem para a maioria das obras, enquanto fórmulas aplicadas com pincel podem ser melhores para certas texturas. Acabamentos em resina oferecem outra alternativa pela qual muitos artistas juram. Quando aplicados corretamente, os selantes fazem maravilhas pelas cores, tornando-as mais vivas. Além disso, eles criam uma barreira contra ameaças cotidianas, como poeira acumulada nas superfícies, raios UV prejudiciais desbotando pigmentos e umidade causando empenamento ou crescimento de mofo. A maioria dos artistas dirá, por experiência própria, que obras seladas mantêm sua aparência original muito melhor ao longo das estações. Comece limpando bem a superfície da pintura para remover qualquer sujeira ou partículas antes de aplicar qualquer coisa. Mantenha o selante cerca de um pé de distância do que precisa ser coberto e mova-se com firmeza sobre a tela. Deixe a primeira camada secar completamente antes de adicionar mais, se necessário, para maior durabilidade.
Ideias de Moldura para Destacar Seu Trabalho
A forma como emolduramos uma obra de arte faz muita diferença no seu aspecto e durabilidade. Hoje em dia também há muitas opções disponíveis. Algumas pessoas optam por aquelas molduras metálicas modernas que realmente se destacam, enquanto outras preferem molduras de madeira com aquele charme clássico. Uma boa moldura faz mais do que apenas parecer bonita, ela realmente finaliza toda a peça e dá a ela uma aparência pronta para galeria, o que funciona bem tanto pendurada na sala de alguém quanto em exibição numa exposição. Além da estética, a moldura protege a própria obra de arte. Ela mantém as bordas seguras contra danos e impede que telas fiquem empenadas com o tempo. Muitos artistas ficam criativos com suas opções de moldura. Alguns fazem pinturas 'flutuantes' acima da parede usando pequenos espaçadores entre a moldura e a tela. Outros utilizam camadas de cartão dentro das molduras para dar profundidade a peças menores. Esses tipos de recursos ajudam a destacar o que realmente importa: a própria obra de arte.
Solucionando Problemas Comuns
Artistas enfrentam todo tipo de problema ao trabalharem em pinturas, mas saber o que costuma dar errado com mais frequência e como corrigir transforma esses contratempos em momentos reais de aprendizado. Os problemas mais comuns? Vazamentos de tinta acontecem o tempo todo, cores se misturam acidentalmente e manchas aparecem onde não deveriam. Quando a tinta é derramada, basta pressionar suavemente com um pano úmido, ao invés de esfregar ao redor. Para aquelas misturas de cores indesejadas, às vezes esperar até que a camada de base seque e então adicionar outra camada por cima faz maravilhas. Acostumar-se a ver os erros como parte do processo faz muita diferença. Em vez de se sentir derrotado pelos erros, essa perspectiva ajuda a desenvolver melhores habilidades e mantém a energia criativa fluindo. Artistas que aceitam esses pequenos acidentes e os superam tendem a desenvolver técnicas mais fortes e ganhar muito mais confiança em suas capacidades ao longo do tempo.